
This tutorial is a part of the Getting started series — Day 2, Week 4, Month 2.
The problem: the team works on tasks and forgets about the overall deadlines
The plan already has columns, but so far they do not reflect your workflow. And the usual scenario is even more complicated: in one spreadsheet someone wrote "Beta - November", a different date appeared in the chat a week later, and the design project knows nothing about these agreements at all. As a result, the sources start to contradict each other, and at meetings the team discusses which version of the plan is correct instead of doing the work itself.
Yesterday we got acquainted with the Planning section and the Unplanned elements column. Today we will configure the plan for your team: give the milestones clear names, set the dates and link them to the work inside the project.
Creating a milestone
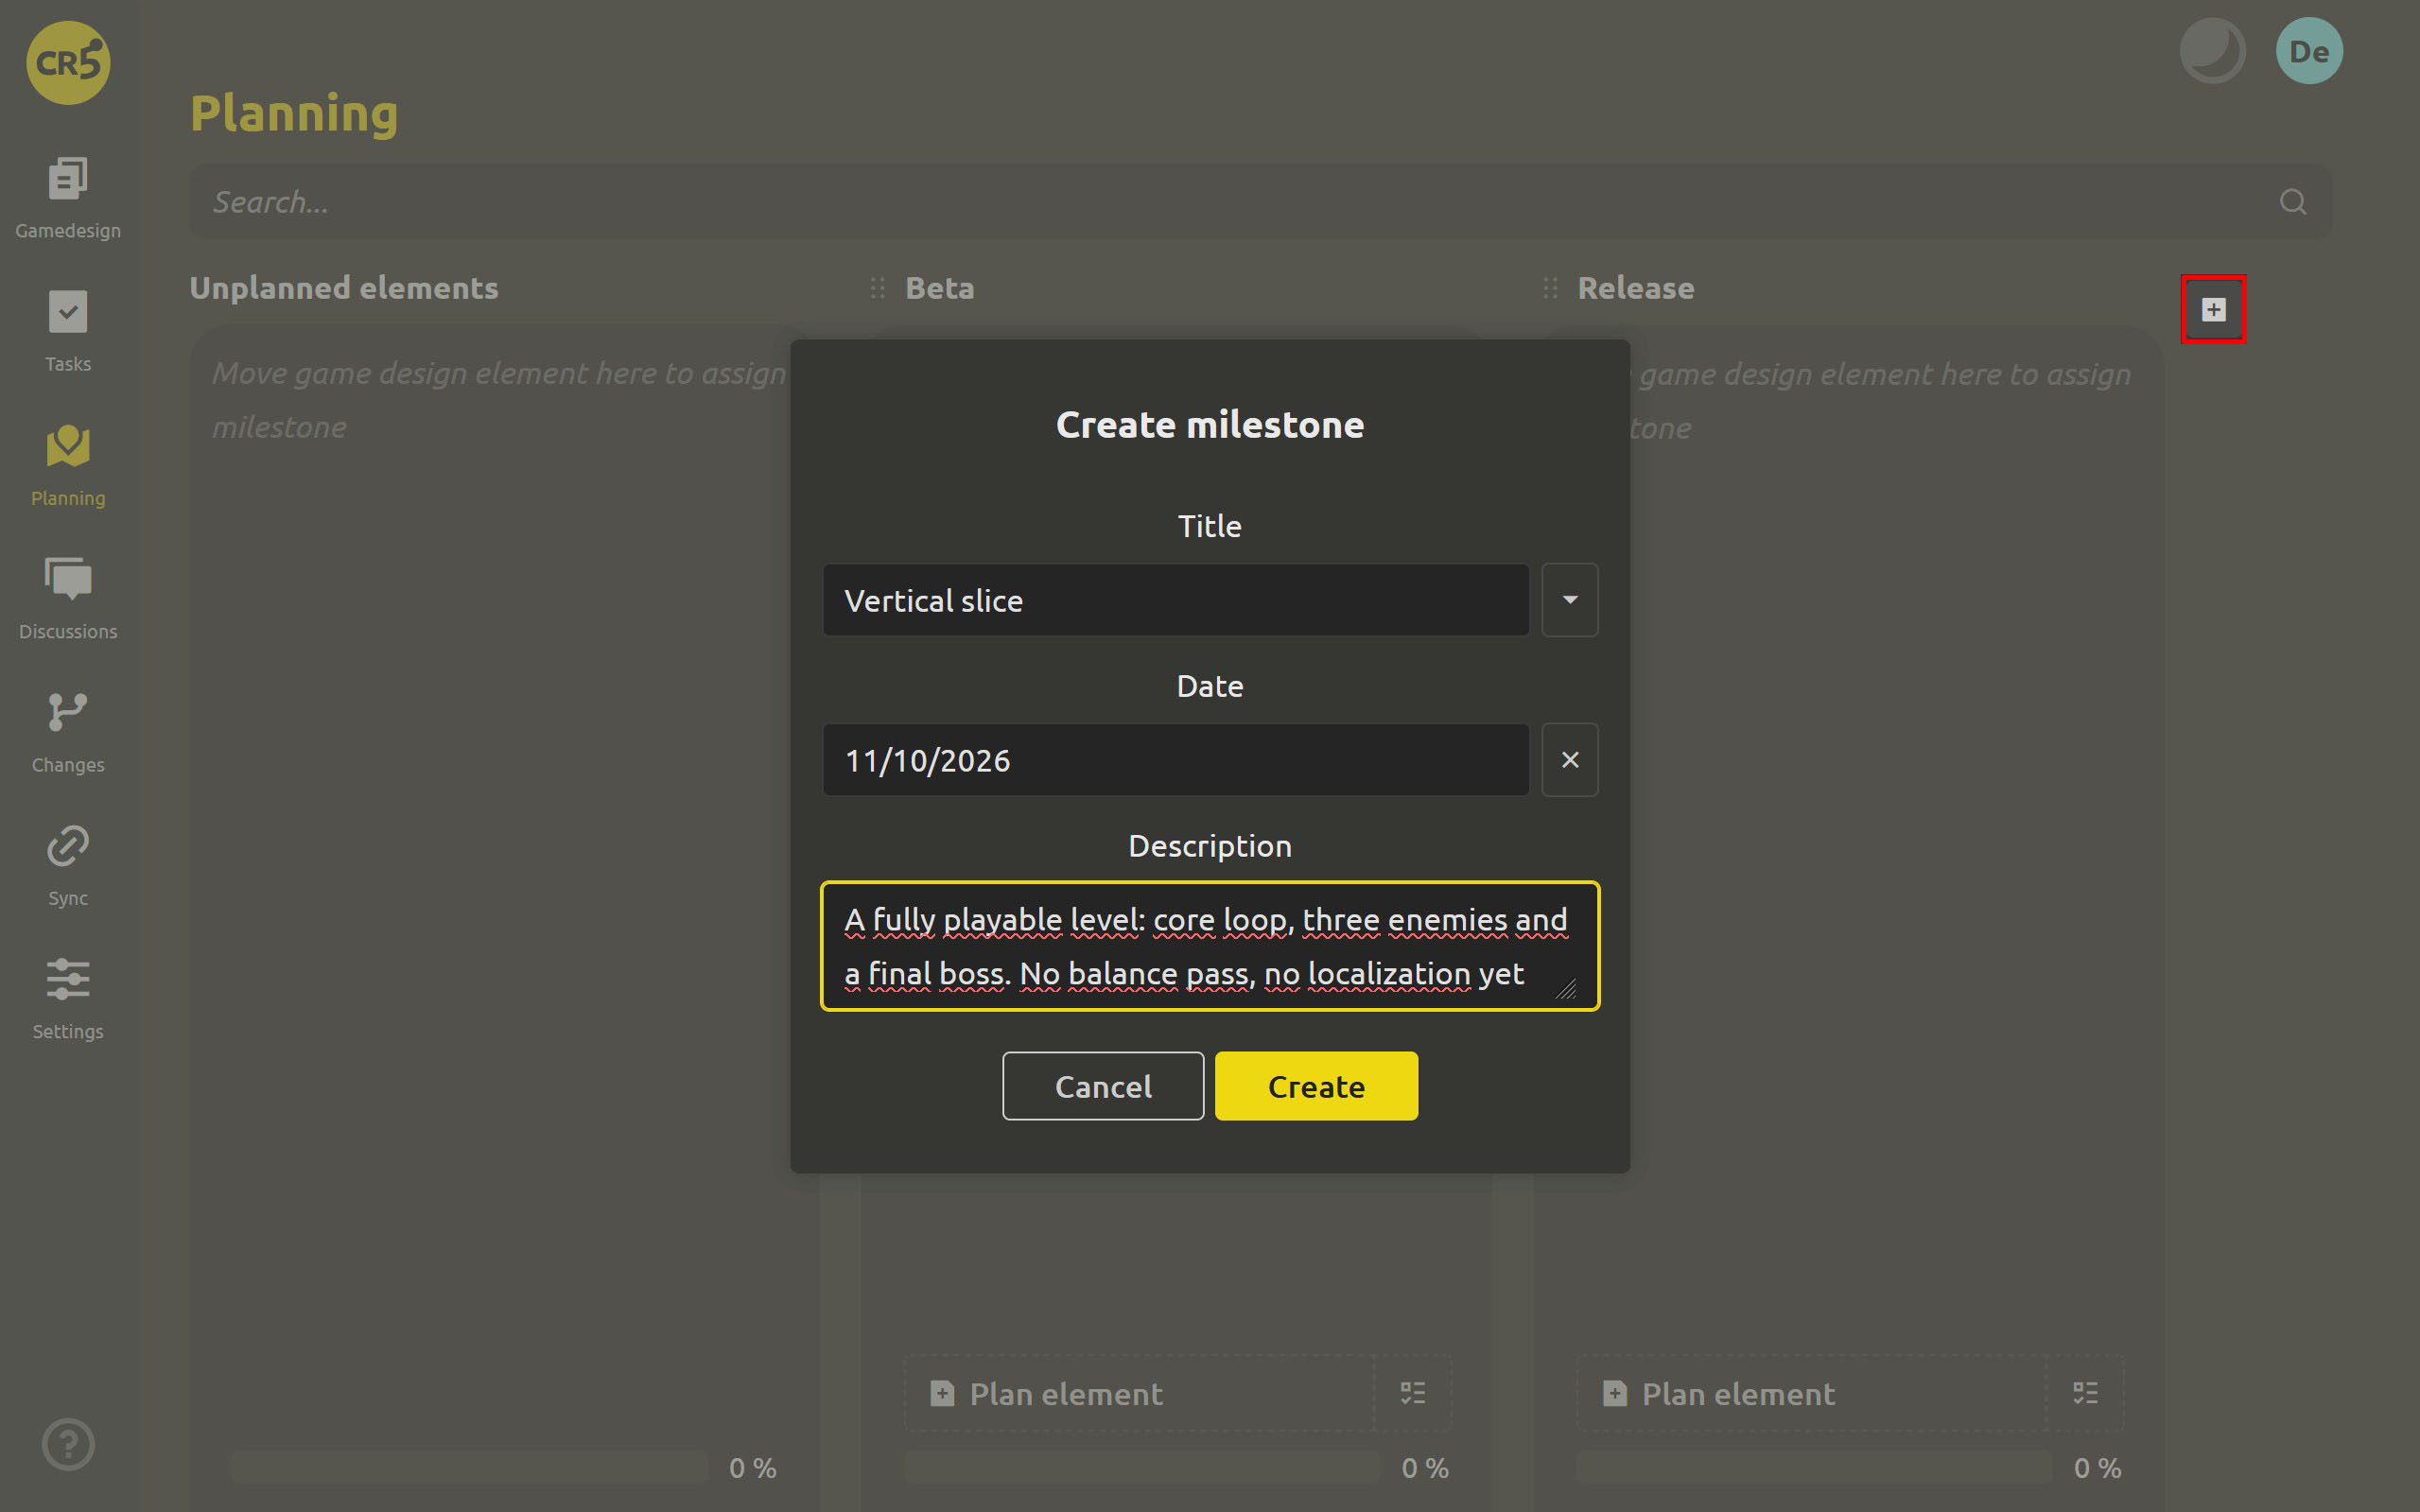
At the end of the row of columns there is a button with the tooltip Create milestone. Only an administrator can create new stages, and to do so he needs to fill in just three fields:
- Title - the name the team will use in their work: for example, "Vertical slice", "Beta" or "Gold release".
- Date - the deadline that will appear in the column header.
- Description - additional information about the milestone. It will be displayed in the column tooltip, so the explanation for the deadline will always stay next to it.
When the form is filled in, the system checks the name. If you leave the field empty, the message "Name of milestone is not set" will appear. If a milestone with that service name already exists, you will see the warning "Milestone with that service name already exists". In addition, every project already comes with two milestones - Beta and Release. They are displayed in your language, so if necessary simply rename them to fit your own process - there is no need to create duplicates.
Who manages the milestones
The permissions here are divided so that the team can distribute work freely, while the structure of the plan remains under control:
- Administrators can create, edit and delete milestones, as well as change their order. For this there is a special drag marker in the column header, and the Edit and Delete items are available in the menu. The button for adding new milestones is also available to administrators.
- Users with write access to an element can move it between columns. Members with read-only access see the plan but cannot change the placement of the elements. Thus, the stages themselves can be managed by administrators, while distributing tasks across them can be done by the whole team within their rights.
The milestones can also be managed from a task card. Open any task and find the Plan milestone parameter. Press Configure to open the Manage milestones dialog: it collects all the milestones with dates and descriptions, and next to each one there are actions for editing and deleting. If there are no milestones yet, the message "No milestones yet" will appear instead of the list.
Moving work and dealing with milestone deletion
You can distribute elements across stages using regular dragging: move a single element to the right column or drag a whole folder to immediately assign a milestone to all the suitable elements inside it. If an element should no longer be linked to a particular stage, drag it back to the Unplanned elements column. With every move, the completion percentage of the corresponding column is recalculated automatically.
Deleting a milestone also does not lead to the loss of work. After confirming the action in the Delete milestone window, the column will disappear, and all the elements that were in it will return to Unplanned elements. The link to the deleted milestone will be removed, but the elements and tasks themselves will remain in the project. In other words, you are removing a deadline that is no longer relevant, not deleting the work associated with it.
What the milestone date means
The milestone date is displayed in the header of its column, and on the elements assigned to it - as a badge. It shows the deadline by which the team plans to reach the corresponding stage. At the same time, tasks may still have their own deadlines, which are set directly in the cards - we covered this in the article about owners, watchers and deadlines.
This way each tool keeps its own job: planning helps you understand what must be ready by a certain date, while the board shows how the work is progressing right now.
What's next: track progress automatically
Milestones help you sort out the deadlines and stages, but there is still one important question left: how ready is the work inside? You do not have to enter the completion percentage manually every time - tomorrow we will look at how to set up automatic progress tracking based on the element's own checklist.
Next: "'How done is this card?' - make elements track their own readiness" (Week 4, Day 3)
FAQ
Can a milestone have no date?
Yes. The Date field is optional, so it can be left empty. In this case the date will not appear in the column header, but all the other features of the milestone will remain available.
Can I rename a milestone or change the order of stages later?
Yes, if you have administrator rights. Select Edit in the column menu to change its name, date or description. To change the order of the milestones, use the drag marker in the header. The same editing and deleting options are available in the Manage milestones dialog - it can be opened through the Plan milestone parameter in any task.
What happens to the elements if a milestone is deleted?
All the elements linked to it will move to the Unplanned elements column, and the link to the deleted stage will be reset. Nothing will be deleted. In the progress section, such elements will show the value Not set for the milestone - if necessary, you will be able to assign a new one.
Can a milestone be assigned to a task?
Yes, this can be done in two ways. Press Plan task in the desired column and select an existing task, or open the task's own panel and set the stage in the Plan milestone parameter. After the assignment, the task will appear in the corresponding column next to the other elements.