
This tutorial is a part of the Getting started series — Day 1, Week 4, Month 2.
The problem: the plan exists, but it is not connected to the team's everyday work
Friday showed how the report helps you understand what is happening in the project. But there is still one important question left: when will everything be ready?
More often than not, the answer has to be looked for in several places: milestones are recorded in a spreadsheet, dates were discussed in a chat, and someone simply keeps the release deadline in mind - for example, remembers that "the beta must be in November". As a result, the plan quickly starts to diverge from the actual state of affairs, and the team gradually stops trusting it, and along with that disappears the desire to update it.
In week two we put the tasks on a board. Now the project needs the second part of the big picture: an understanding of which elements are ready and which milestone they belong to. For this, IMS Creators has the Planning section - it was already mentioned in the tour of a cloud project.
What the Planning section shows
Open Planning in the project menu. In front of you there will be a screen with several columns:
- The first one holds Unplanned elements - all the elements that have progress tracking enabled but no milestone assigned yet.
- The other columns correspond to milestones: each one has its own date in the header. In the next article we will show you how to create such milestones and give them names.
- Each element displays a checkbox and, while the work is not finished, a completion percentage. At the bottom of each column there is a progress bar, and above all the columns there is the shared Overall progress, showing the state of the whole project.
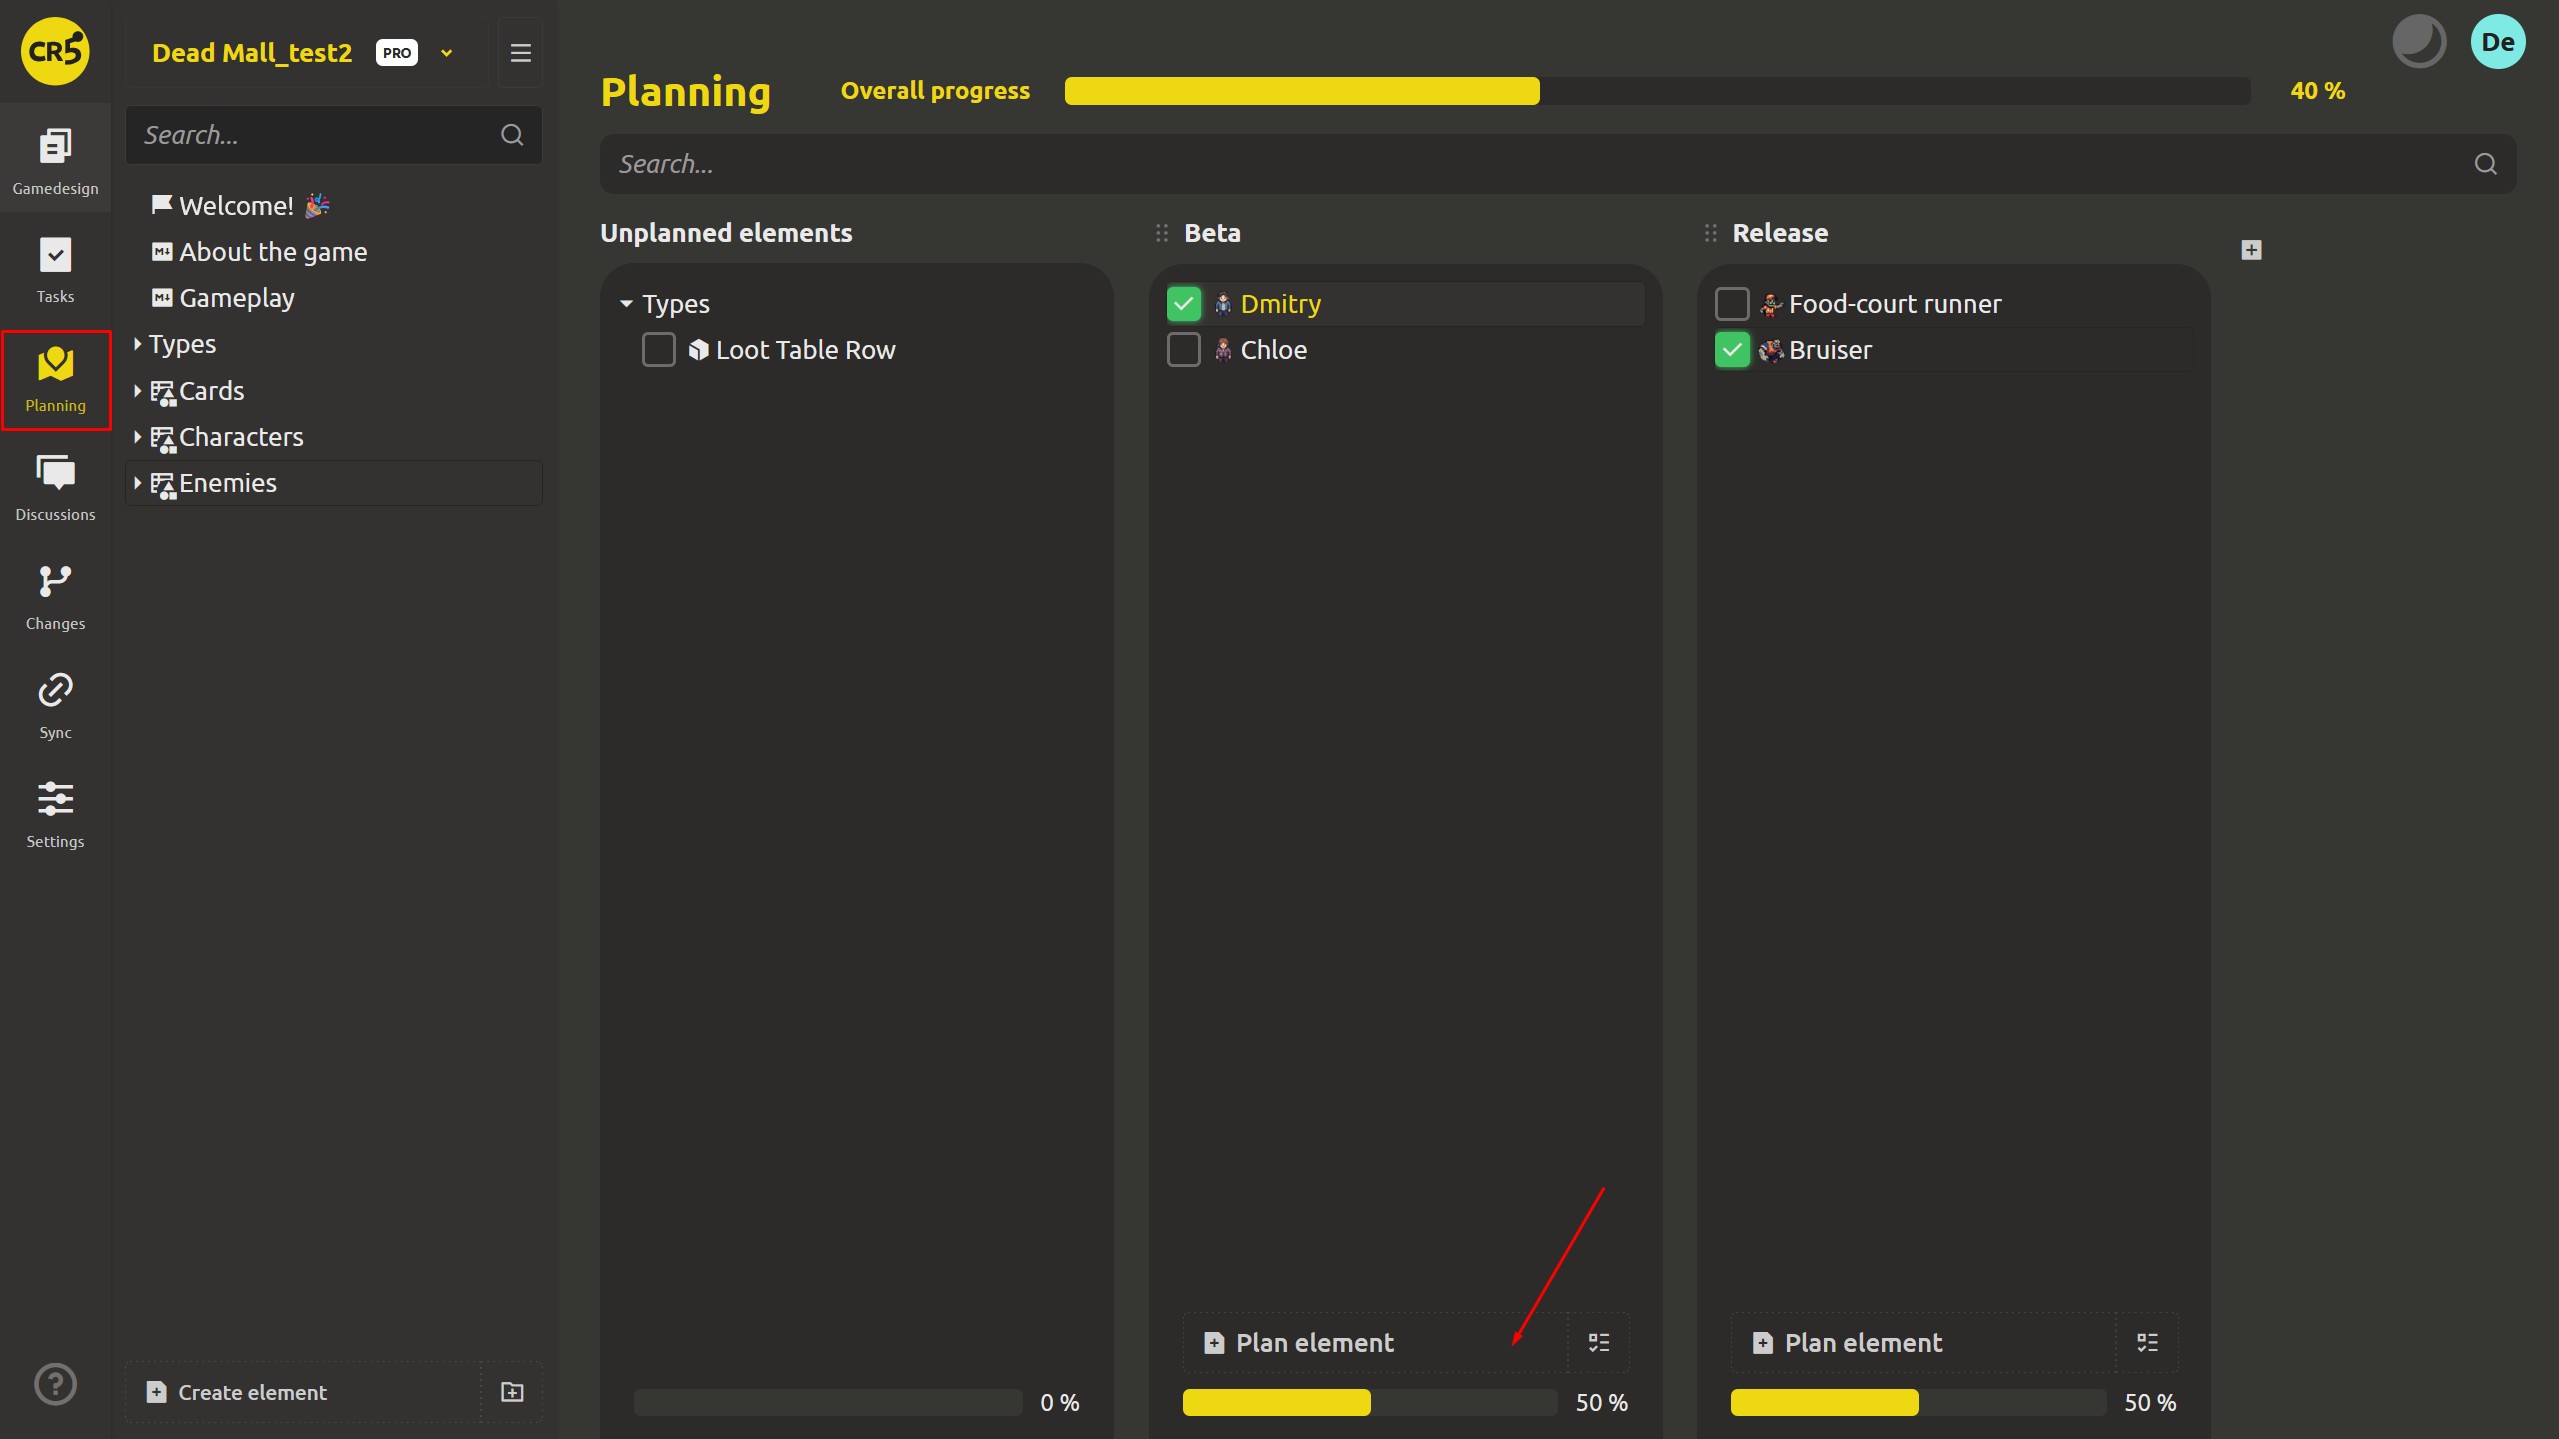
Only elements with progress tracking enabled get into the plan
This is exactly the rule that helps the section show the real picture instead of simply counting everything in a row: an element appears in the plan only if progress tracking is enabled for it. The corresponding switch can be found in the element's settings, in the advanced section. It is called Tracks completion progress, and the tooltip explains its purpose: "This element will affect on overall project progress".
In most cases you will not have to change any settings. The base element types of a new project - Game object, Game mechanics, Level, Script and Graph - are already created with progress tracking enabled. That is why levels, mechanics and game objects automatically appear in the plan.
For the other types everything works differently: text elements, Markdown notes and tasks are not counted by default. If you want to include them in the overall progress, it is enough to activate the switch in the settings. As a result, the system calculates the metrics only for those elements whose completion is actually planned, and does not inflate the total amount of work at the expense of auxiliary materials.
Exception: template elements
There is one more important rule: an element marked Is template is not counted in the overall progress, even if progress tracking is enabled for it.
For example, base objects such as Character or Enemy can serve as templates on which game entities are created. They describe the structure, but they are not in themselves tasks that need to be completed. If such templates were counted in the plan, they would constantly increase the total amount of work, even though there is no need to mark them as complete. Therefore the system counts the instances created from them rather than the templates themselves.
How to add elements to the plan
There are three ways to add work to the plan:
- Drag an element from the project tree straight into the right column. You can also drag a whole folder - all the nested elements with progress tracking enabled will move into the column together with it.
- Press Plan element at the bottom of a column. A dialog for selecting elements from the game design workspace will open.
- Choose Plan task - in the same way you can add a task to the plan and assign it a milestone.
If you try to add an element whose progress tracking is disabled, the system will warn you with the message "Selected element doesn't track progress" and offer to enable the corresponding setting: "Do you want to enable progress tracking for selected element?". Agree - and the element will appear in the plan right away.
How to navigate a large plan
When a project grows, it becomes harder to find the needed elements among the many columns and cards. For this there are three tools, and all of them are located right on the planning page:
- Show planned elements by folder - an item in the folder's menu that leaves on the board only the work that belongs to the selected folder.
- The search box above the columns. You can enter plain words or use full filter expressions: the system recognizes them and highlights them as you type. The same smart filters that we looked at in the article about finding every card dealing 20+ damage work here.
- Overall progress at the top of the screen. It shows a summary figure for the displayed elements - it is convenient to use when you need to briefly report on the state of the project.
Important
- Planning is available in the cloud project. The desktop app remains a design editor and does not include team tools - we covered this in the tour of a cloud project.
- Only elements with progress tracking enabled are included in the calculation. If the plan looks unexpectedly empty, check the element settings first: the switch you need may simply be turned off.
- Any role that has write access to the corresponding element can move elements between columns. A user with read-only rights will be able to view the plan but not change it. Creating, renaming and deleting the columns themselves, however, can only be done by an administrator - we will tell you more about this on Tuesday.
What's next: create the milestones and set the dates
For now the columns in the plan do not yet reflect your particular workflow. In the next article we will look at how to set up milestones to match the team's tasks: for example, single out the Beta, the release or the vertical slice - the stage whose deadlines you are actually ready to commit to.
Next: "Your milestones live in a spreadsheet - put them on the project" (Week 4, Day 2)
FAQ
Why are not all project elements displayed in the plan?
Two conditions affect this: Tracks completion progress must be enabled for the element, and it must not be marked as Is template. Both switches are located in the advanced section of the element's settings. The remaining elements are still available in the project tree - they simply do not take part in the progress calculation.
Who can open the Planning section?
Any role in the project can open the section. However, moving elements between columns requires write access to the element itself. The menu item becomes available when the team menu or the game design menu is enabled, or when an administrator activates the Make planning section public setting for users without a role. Creating and editing the milestones themselves can only be done by an administrator - read more about this in the next article.
Can a whole folder be planned at once?
Yes. It is enough to drag the folder into the right column, and all the nested elements with progress tracking enabled will receive that milestone. If some of them have tracking disabled, the system will show the dialog "Selected element doesn't track progress" and offer to enable it.
Can the plan be viewed in the desktop app?
No. The planning section belongs to the cloud project: that is where the team works with milestones and deadlines. The desktop app is intended for design editing. Why its set of tools differs can be found out from the tour of the cloud project.