
This tutorial is a part of the Getting started series — Day 5, Week 4.
The problem: the model is the last thing that goes to the cloud
All this week the assistant has been working with the project by sending your prompts, your data, and the requests to the model off to a provider's cloud. Yesterday MCP closed the loop inside your machine, but the model the external AI tool talked to could still live on someone else's servers. For an indie game that's usually not a problem. For some projects it's simply unacceptable.
The main thing to understand: this isn't an architectural defect, it's how the architecture naturally works. Your design is plain files in git that the AI can read and edit, with no cloud dependency at all. Only the model itself is left outside your device, and it can run on your machine too.
Local models: Ollama
Ollama is a utility that runs open language models on your local machine. The installation is a one-time thing, models are downloaded with a single command - and you get cloud AI functionality running on your own hardware. Your data never leaves the computer.
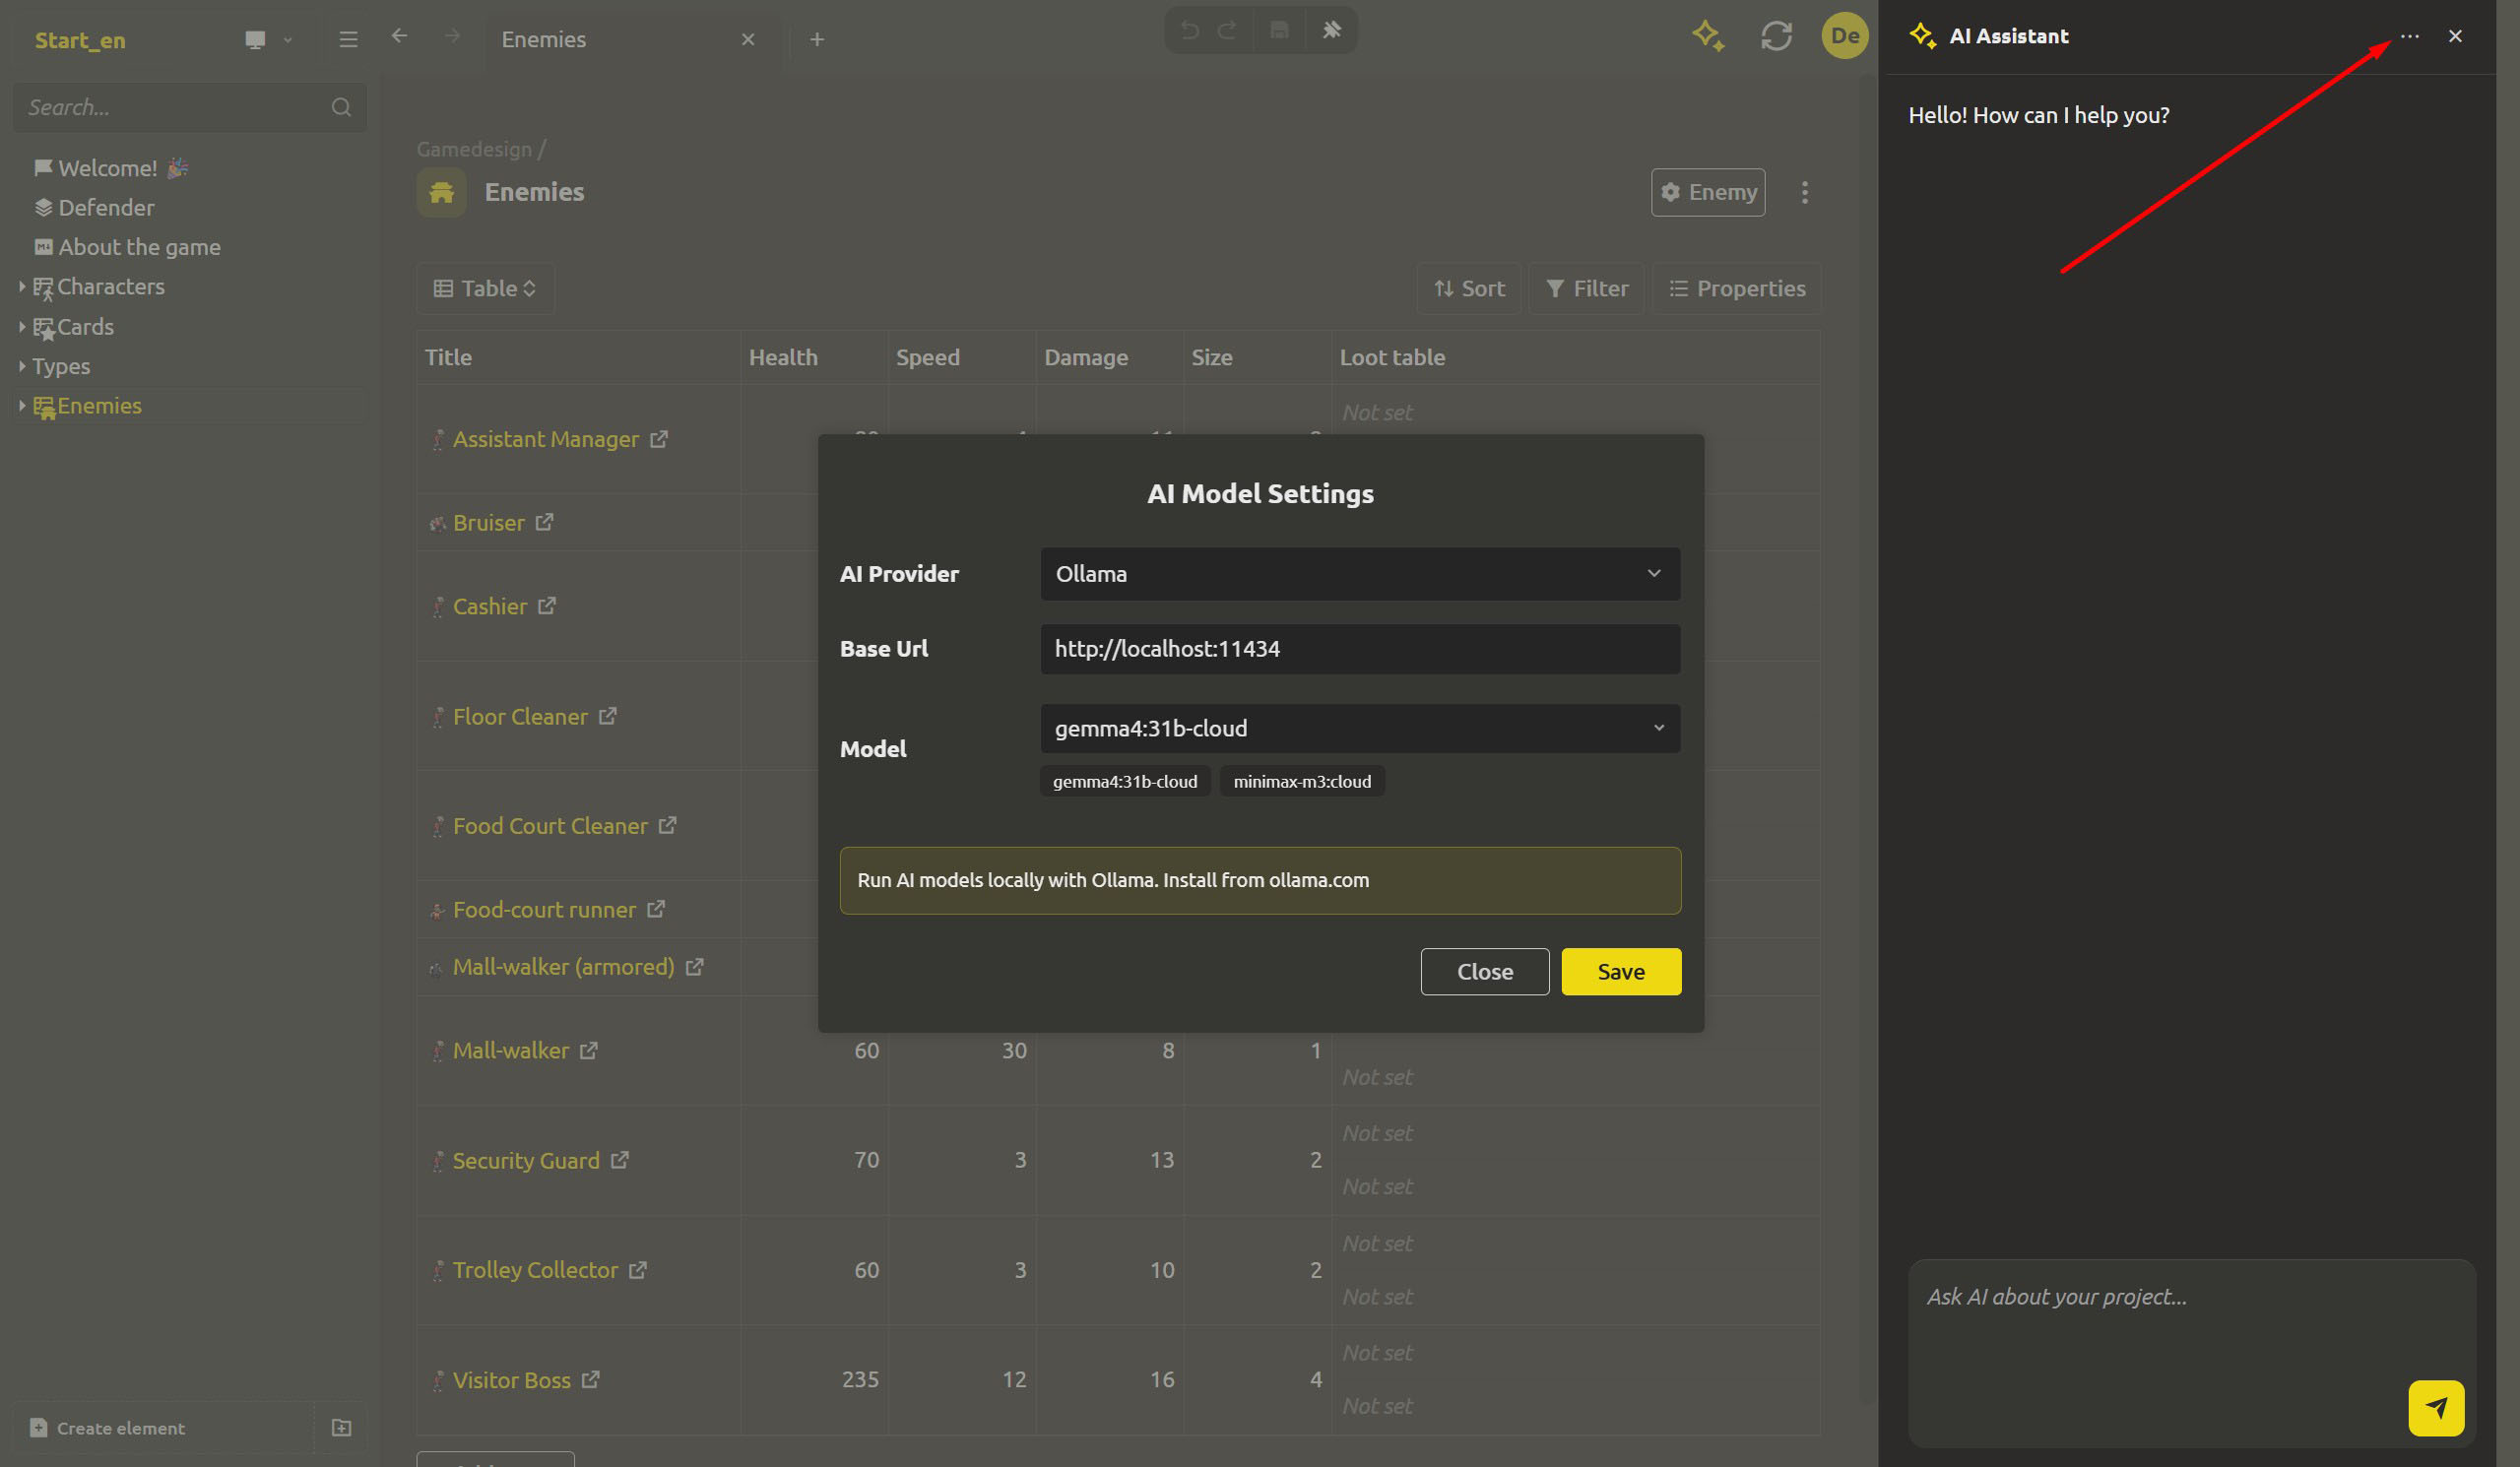
- Install: ollama.com (the same link is repeated in the app's own tip in the AI settings: "Run AI models locally with Ollama. Install from ollama.com").
- Download a model:
ollama pull <model-name>- for examplegemma4:26bor anything else from Ollama's catalog. - No API keys, no account, no subscription. Ollama is open source and runs on your processor.
If you have an Ollama account, you can also run cloud models like
gemma4:31b-cloud- those run through Ollama's cloud and need an account plus an internet connection.
Ollama deploys a local server available at http://localhost:11434
Connect your own model
The assistant already works with different providers using the familiar scheme: Settings → AI Model Settings, the same as on Day 1. In the AI Provider field select Ollama, the field defaults to the local server: http://localhost:11434. Enter the name of the model you downloaded, Save - done, without keys and accounts.
Everything is intuitive: the app asks you to Select or type a model, or you can enter model name directly. The list is fetched straight from your local Ollama server, so everything you've downloaded shows up in the dropdown right away.
From this moment every assistant workflow can run on your own hardware:
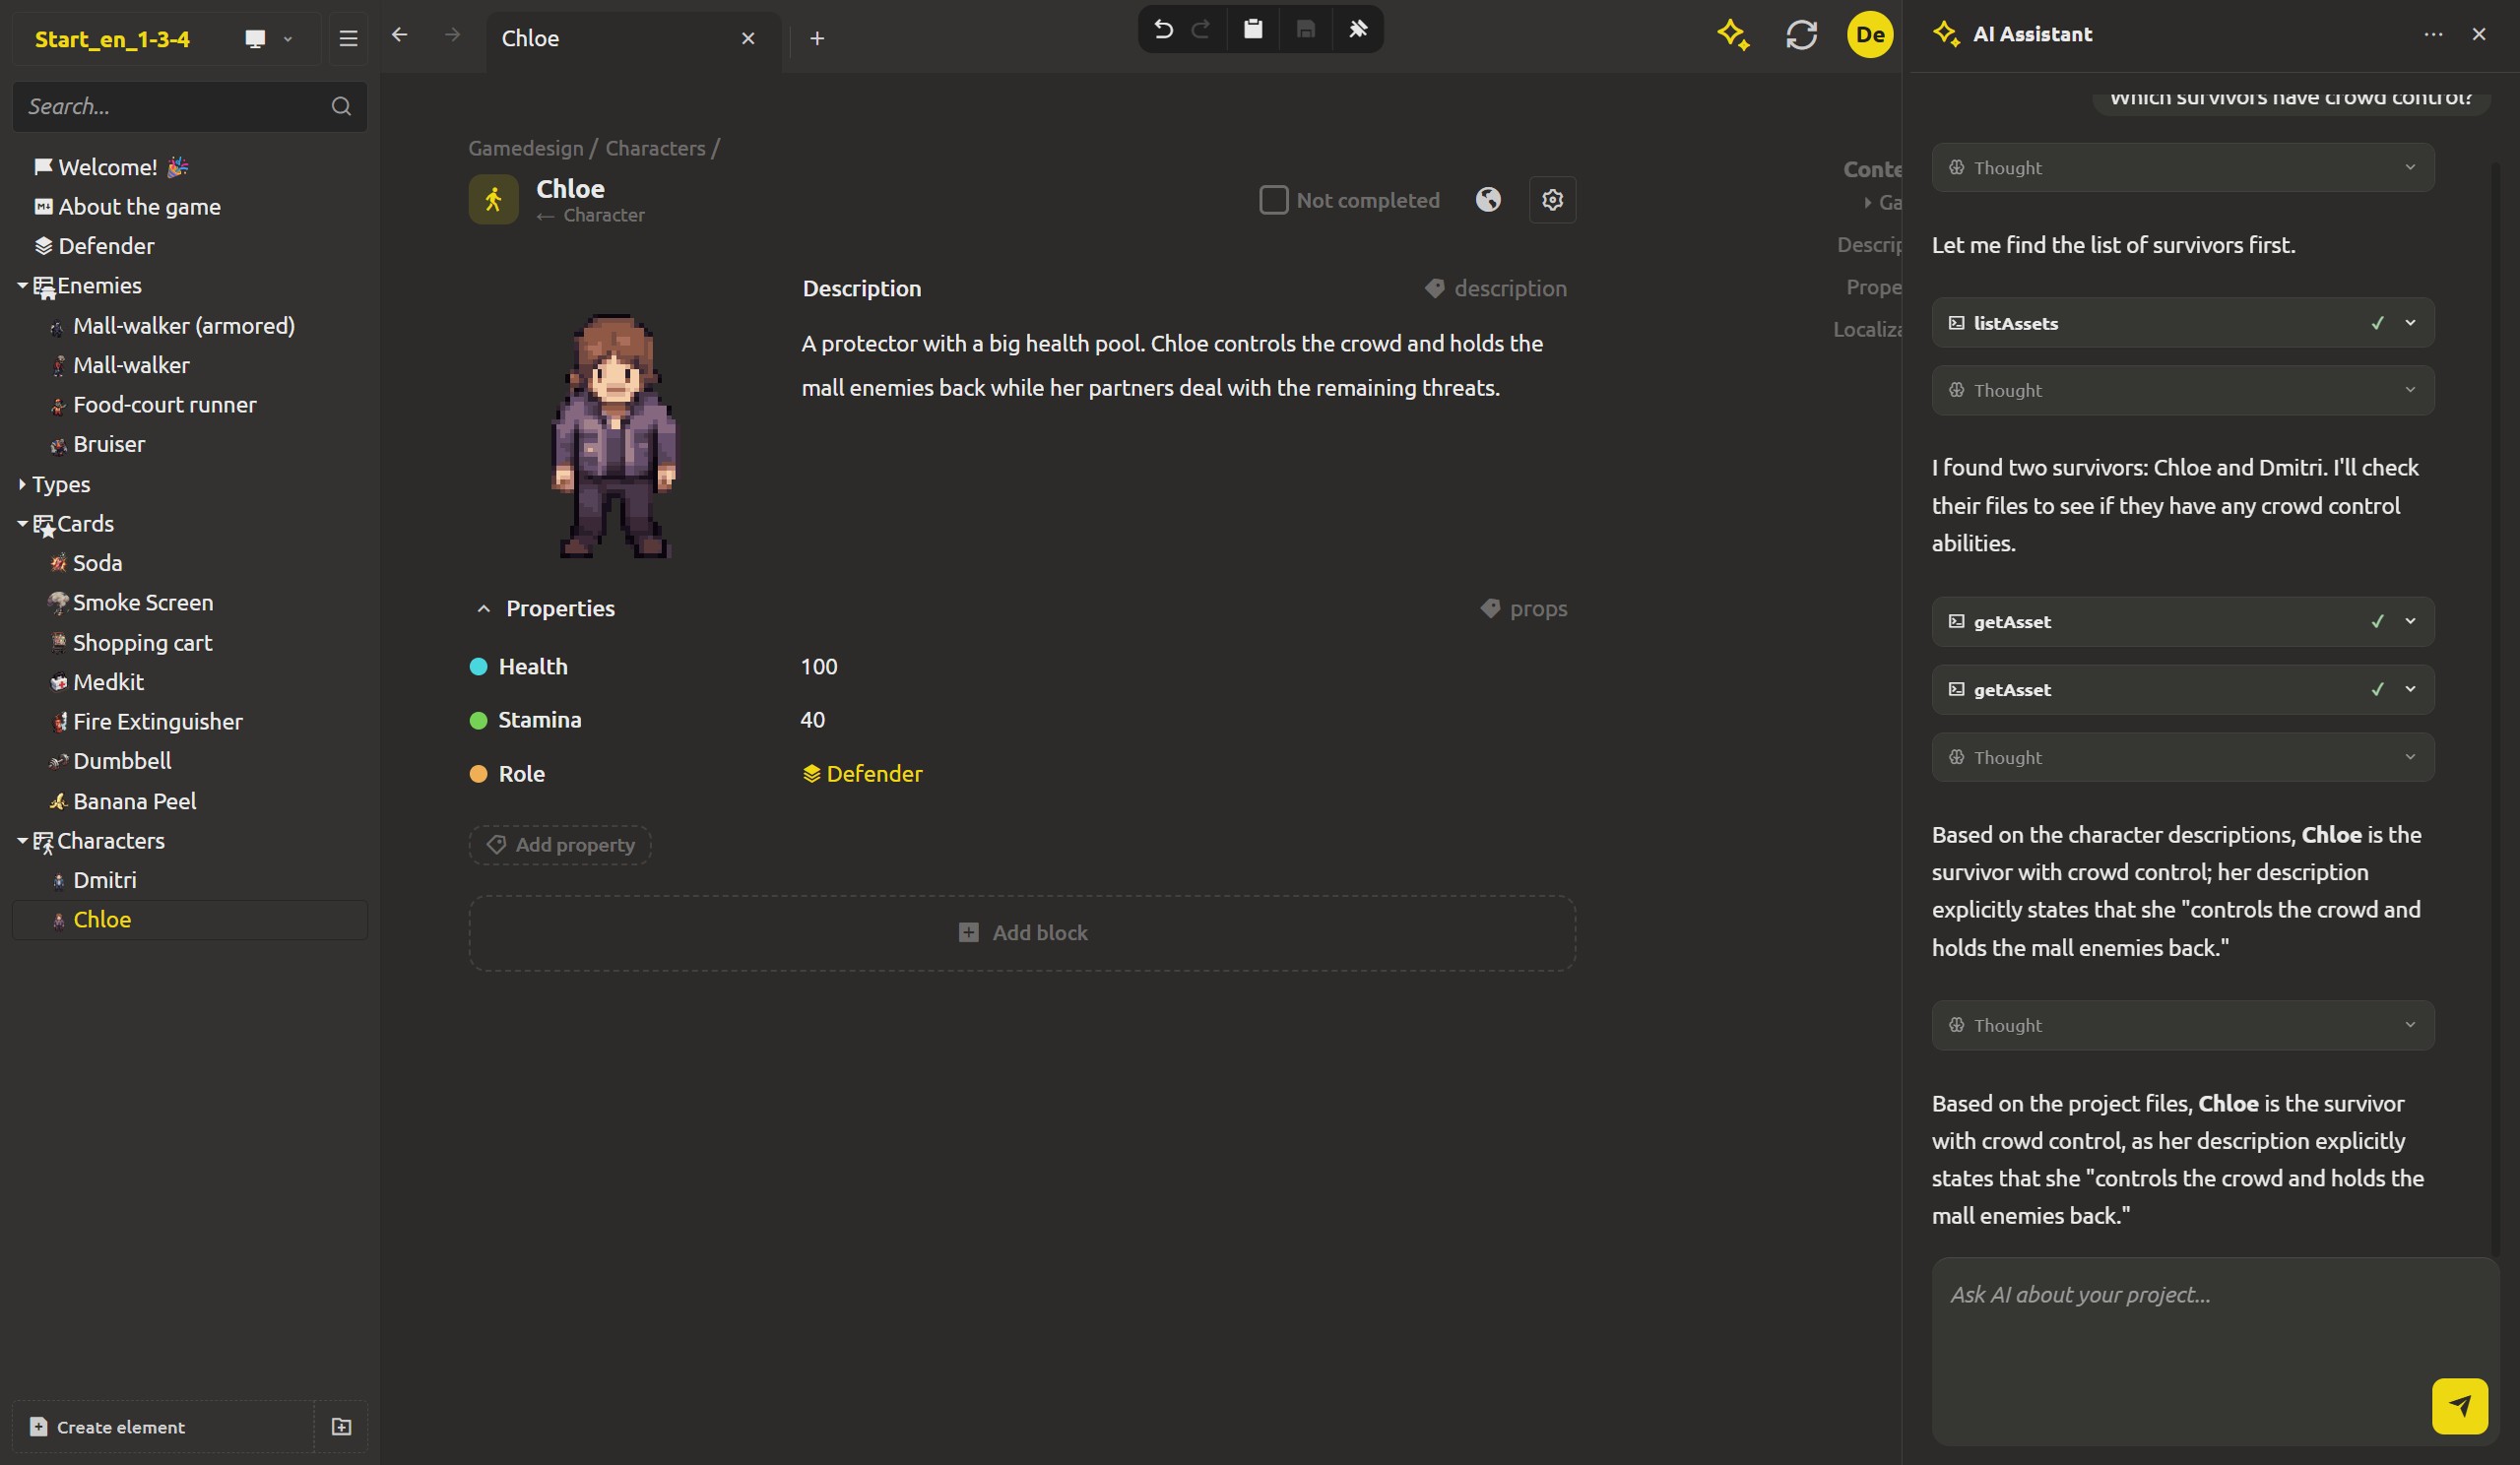
- Ask the GDD anything: "Which survivors have crowd control?" - the assistant reads the project and answers, model included.
- Create drafts of the zombie roster in one prompt - the created elements are saved in the
Enemiescollection. - Tune the 40-card deck with a rule - the edit and the Changes panel work identically.
What "offline mode" gives you in practice
There are two truths here, and it's worth being precise:
- The AI agent needs no internet. The model is local, the project is local, and the whole loop - from prompt to tools to edits - lives without an internet connection. Work from anywhere, losing nothing in convenience.
- A local model is a full-fledged model. These are the same models that run in the cloud. For tasks like reading the structure, creating content, and making edits, their power is enough, and the latest models keep closing the gap with cloud services.
Important: powerful models require enough resources from your device - what used to run in a data center now uses your device's resources.
Five days that closed the loop
On the first day you asked your GDD and got useful answers, then the assistant drafted new elements, then we worked on balancing all the enemies in one request, after that any AI tool connected through MCP, and finally we befriended a local neural network with our project.
We have finished the first cycle of our posts: your design is data, and the tools read and write that data to fit your needs: local files, local structure, and, if you want, a fully local AI.
What's next: a new cycle
That's the full Month 1 loop: create → structure → link → balance → export → edit - from a couple of scattered notes to a structured, AI-integrable design connected to the game engine, in plain files you own.
Month 2 builds on the same project and the same foundation, but the design stops being just a document. It becomes a project that many participants can work on. We'll cover the web version and get teamwork going: comments next to elements, two-way sync with your local folder, then we'll look at kanban boards with discussions inside the project and sharing, roles, and permissions set up, and finally planning: milestones, progress tracking, and much more.
FAQ
Where does Ollama run and does it cost anything?
It runs as a local server on your computer (default http://localhost:11434) and it's free - no API keys, no accounts, no per-token billing. The only resource is your hardware: the model runs on your machine, not in a data center.
How do I get a model to use?
Install Ollama from ollama.com, then download a model from the command line: ollama pull <model-name>. Everything you've downloaded appears in the list the app fetches from the local server in the AI Model Settings.
Will the answers be as good as the cloud?
Local models are a bit weaker than cloud ones, but it all depends on your needs and your hardware. For game design work - reading a structured project, drafting content, applying bulk changes - a local model will very often be enough.
Does the app really work with no internet connection?
Yes - in the desktop app, where the model and the project are both local, the entire workflow runs without a network connection.
How do I connect local Ollama to the web (cloud) version?
Browsers enforce CORS, so by default the web app can't call your local Ollama server. Allow it through the OLLAMA_ORIGINS environment variable, then fully restart Ollama. The web app lives at https://ims.cr5.space.
Windows (PowerShell): set the variable, then quit Ollama completely (check the background mode) and start it again.
setx OLLAMA_ORIGINS "https://ims.cr5.space"Linux (systemd): set it in a service override, reload the config, restart.
sudo mkdir -p /etc/systemd/system/ollama.service.d
echo 'Environment="OLLAMA_ORIGINS=https://ims.cr5.space"' | sudo tee /etc/systemd/system/ollama.service.d/override.conf
sudo systemctl daemon-reload
sudo systemctl restart ollama
macOS: Register Ollama with the system via the launchctl command. After that, quit the Ollama app and open it again so the changes take effect.
launchctl setenv OLLAMA_ORIGINS "https://ims.cr5.space"Or just use the desktop app, which has no browser restriction.